Create a Custom Virtual Private Cloud (VPC) on AWS

I loveee Linux & the command line! I could sell my birthright for some cake I watch movies, eat, play music & day-dream in my spare time
Creating a custom VPC with public and private subnets can be a great way to ensure security and control over your resources in AWS. In this article, we will walk through the steps of creating a custom VPC with public and private subnets, an internet gateway and route tables.
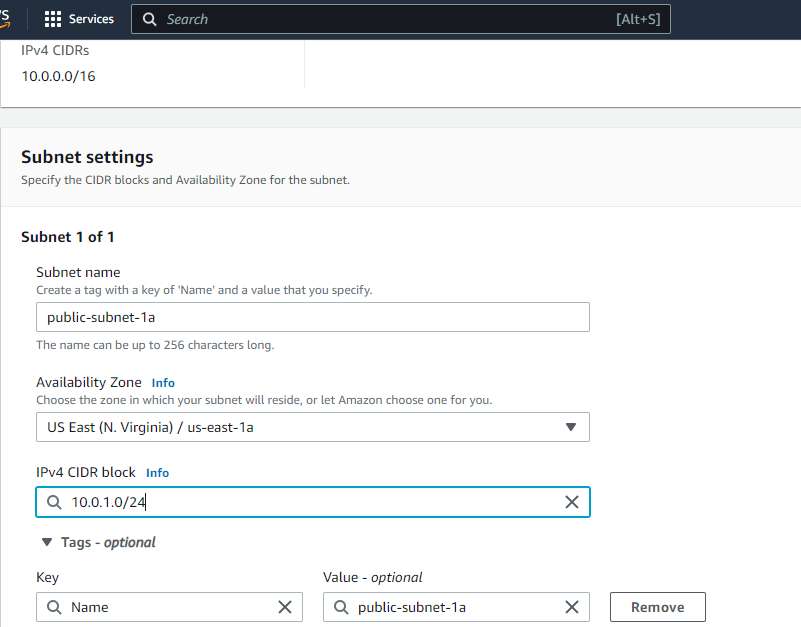
We will create a VPC called 'my_vpc' with a CIDR block of 10.0.0.0/16. We will use two availability zones within the US-East (N.Virgina) region called US-East-1a & us-East-1b. In each availability zone, we will have one public subnet and one private subnet, making four subnets in total. Each subnet will have its CIDR block. To learn more about CIDR blocks, please refer to this article. We will also have a public route table with an attached internet gateway so our public subnets can have access to the internet, and a private route table for the private subnets.

1. Creating a custom VPC
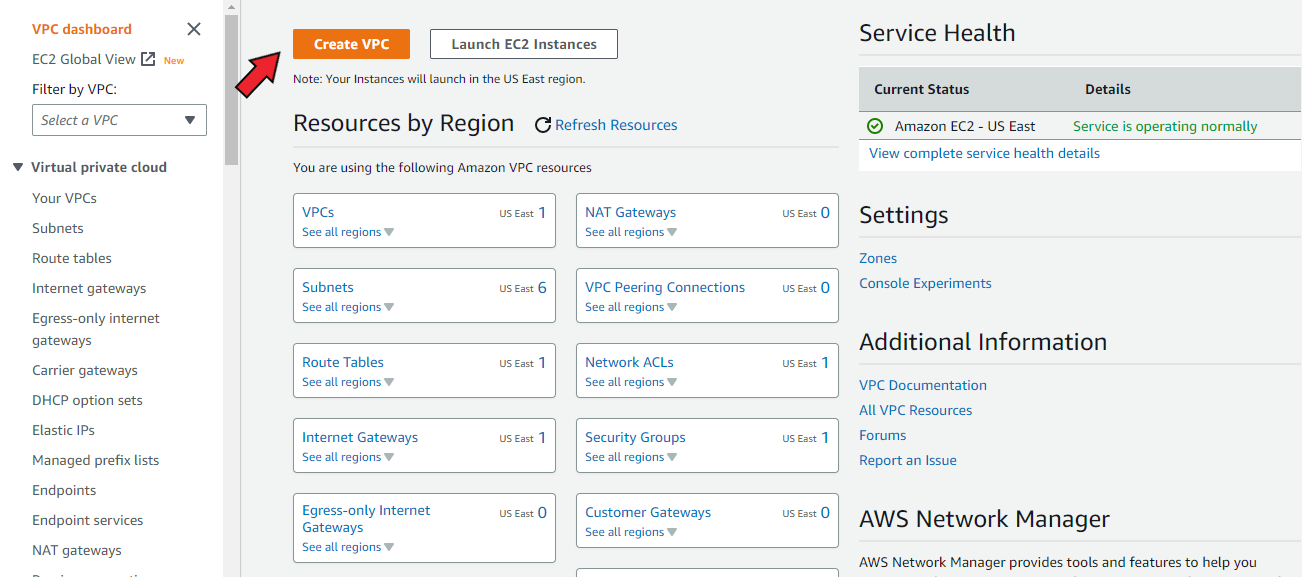
The first step in creating a custom VPC is to log into the AWS Management Console and if you wish to follow the exact steps in this tutorial, make sure you are in the US-East (N.Virginia) region.

Click on 'VPC' to navigate to the VPC service and click on the “Create VPC” button.
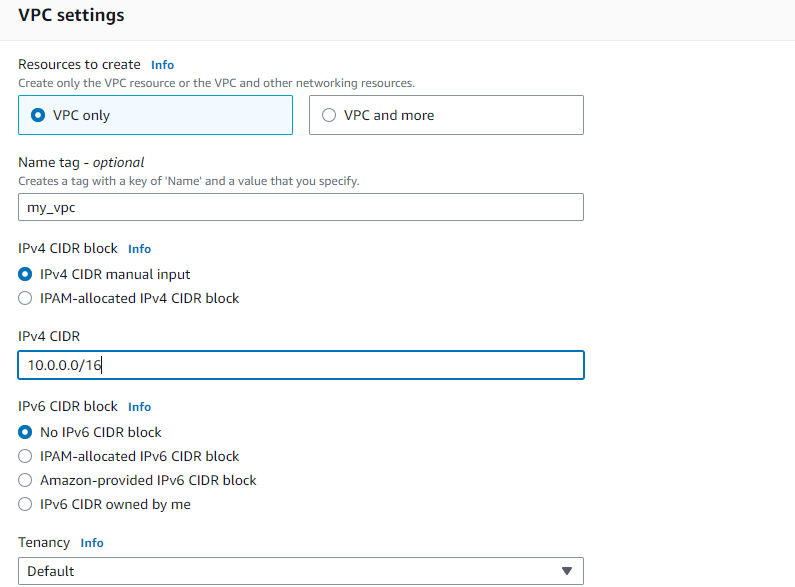
On the next page, select ‘VPC only’. Enter a name for your VPC and the CIDR block - 10.0.0.0/16. Leave other settings in their default states and click ‘Create VPC’.
2. Create Subnets
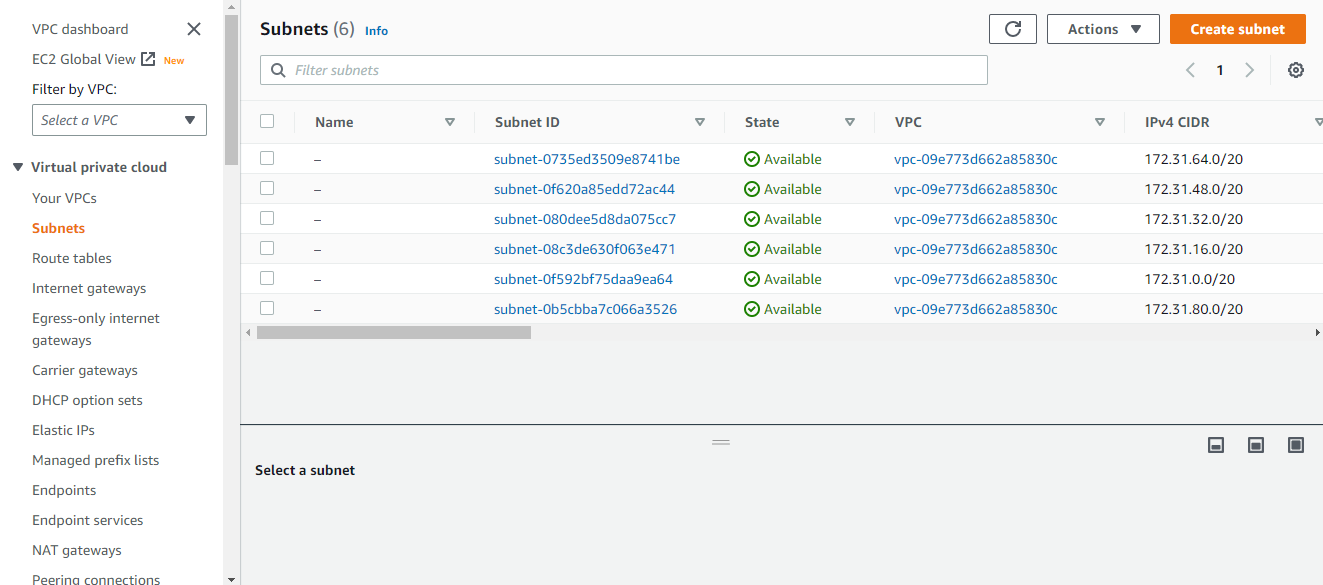
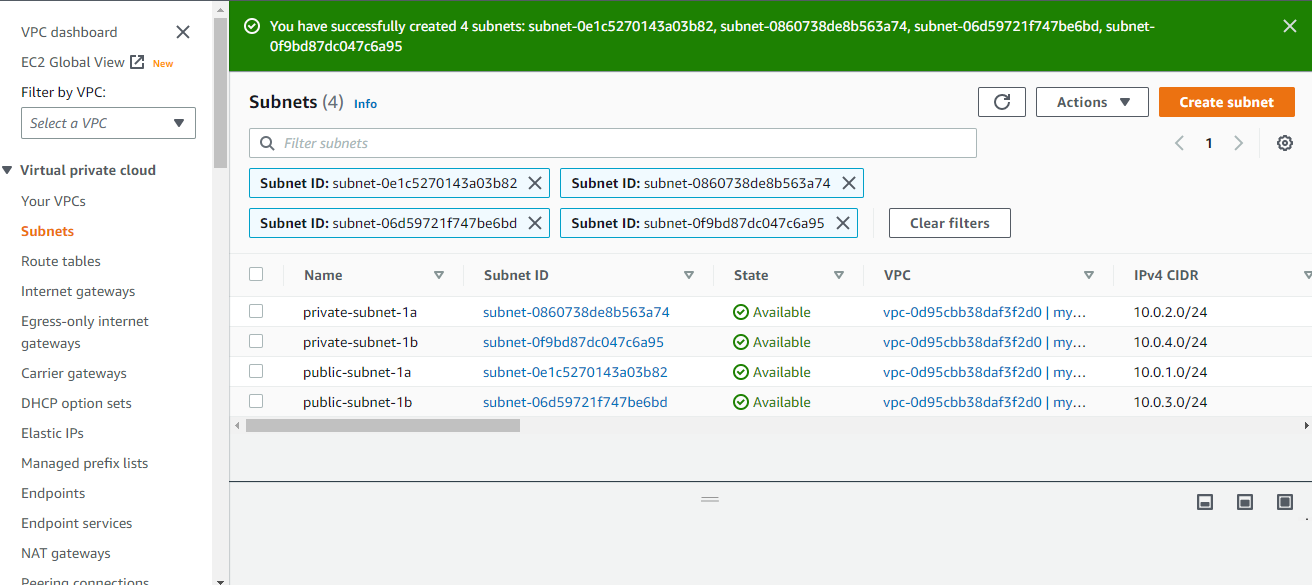
When you are finished, click on ‘Create subnet’. You will be redirected to the Subnets page with a list of your newly created subnets.
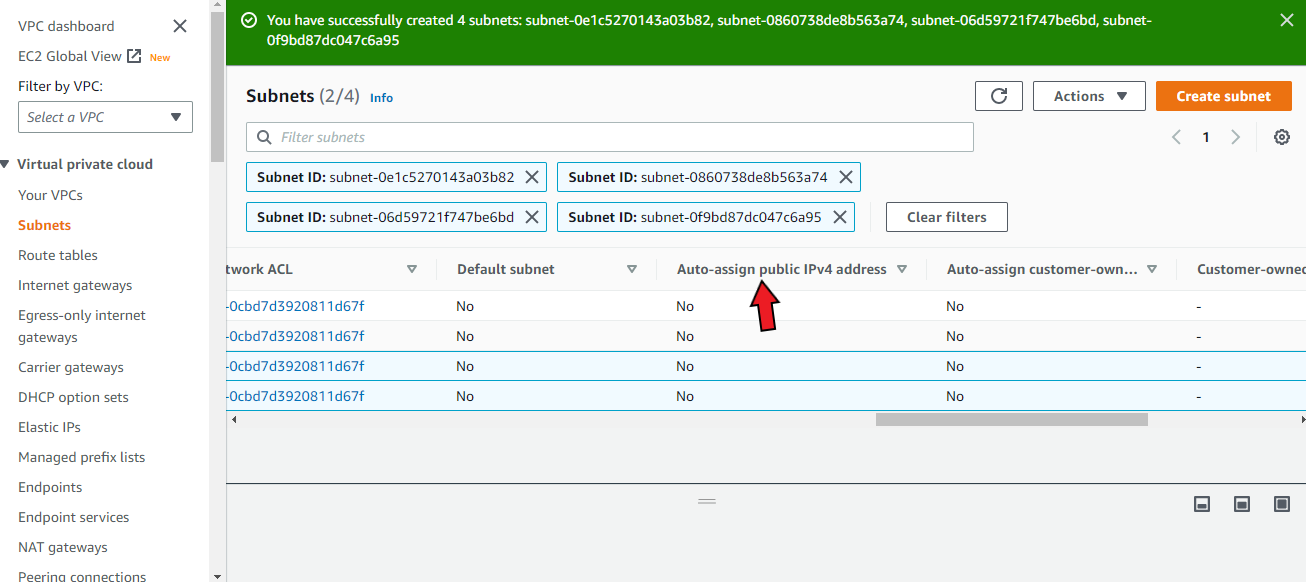
Select the public subnets and scroll across the page until you find the ‘Auto-assign public IPv4 address’ column. It should be currently set to ‘No’ which means they are not configured to assign public IPs. This is NOT what we want for our public subnets.
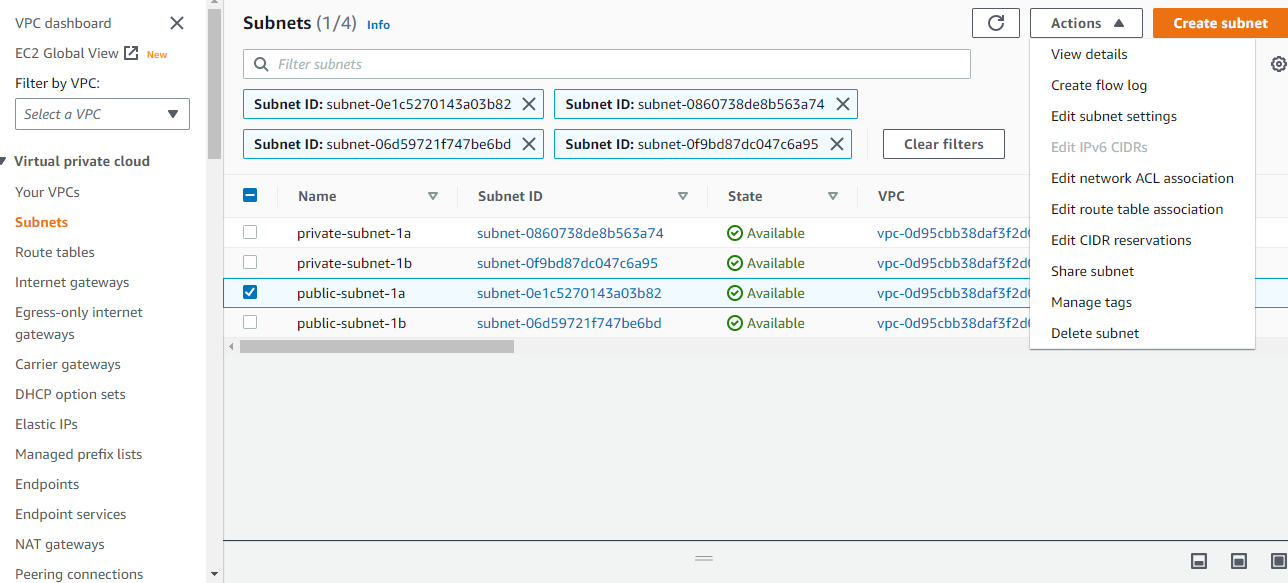
To change this, select each public subnet at a time and click ‘Actions' -> 'Edit subnet settings’.
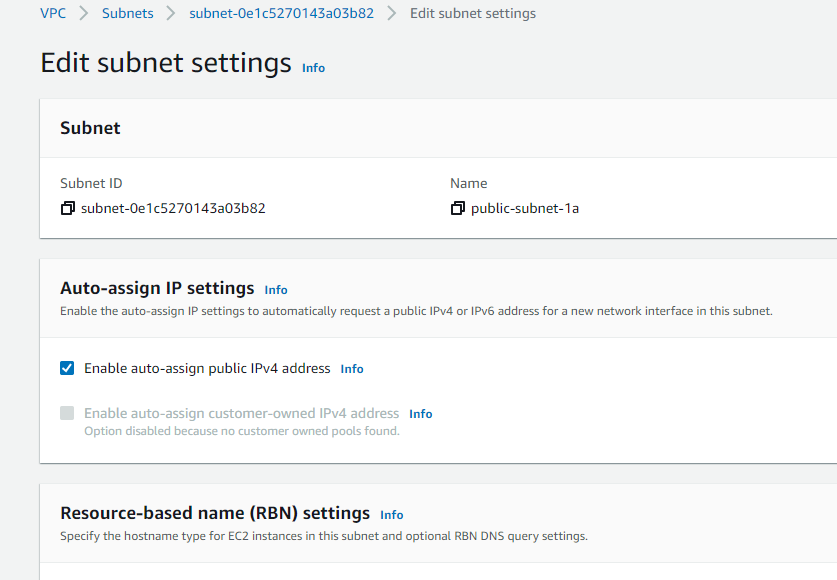
On the following page, tick ‘Enable auto-assign public IPv4 address’. Scroll down and click ‘Save'. Repeat the same process for the second public subnet.
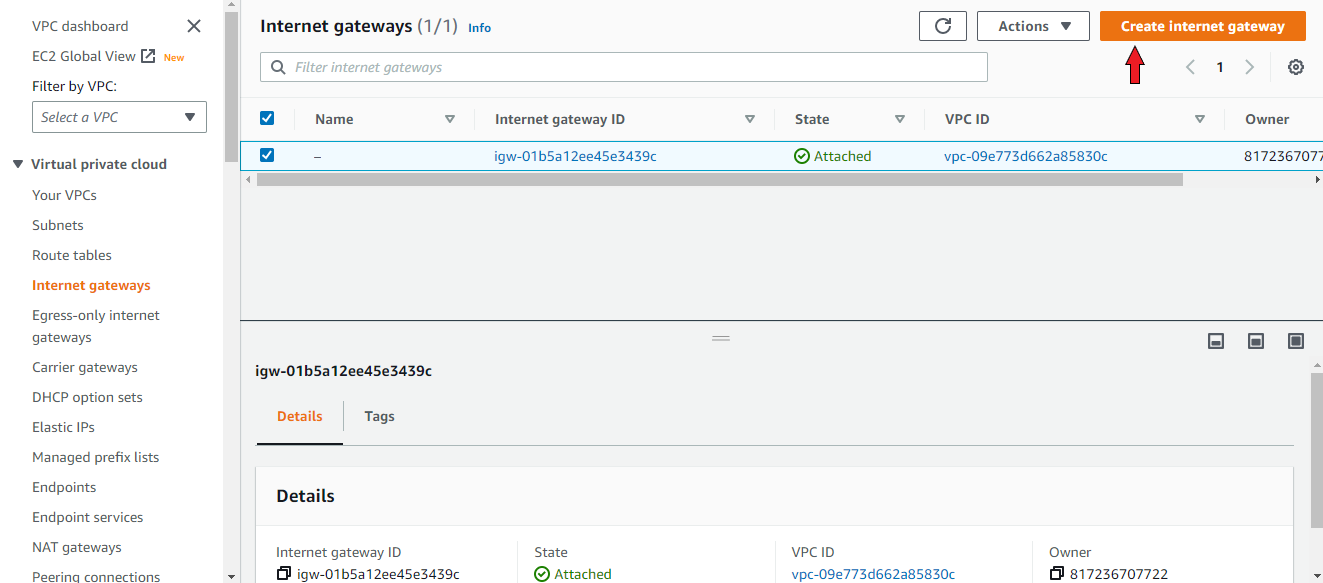
3. Create an Internet Gateway
To allow resources in your VPC to connect to the internet, you will need to create an Internet Gateway. An Internet Gateway is a VPC component that allows communication between instances in your VPC and the Internet. To create one, navigate to the Internet Gateways section of the VPC service and click on the “Create Internet Gateway” button.
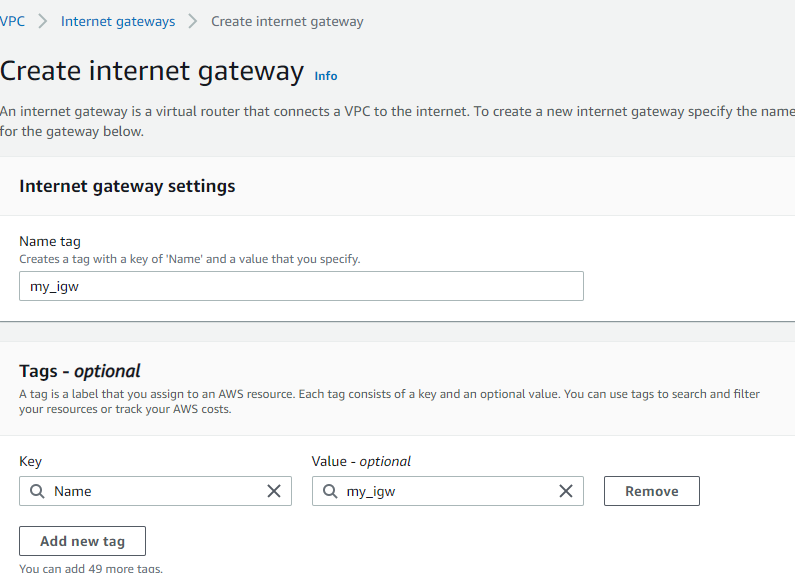
Enter a name for the internet gateway and click on ‘Create internet gateway’.
4. Attach Internet Gateway
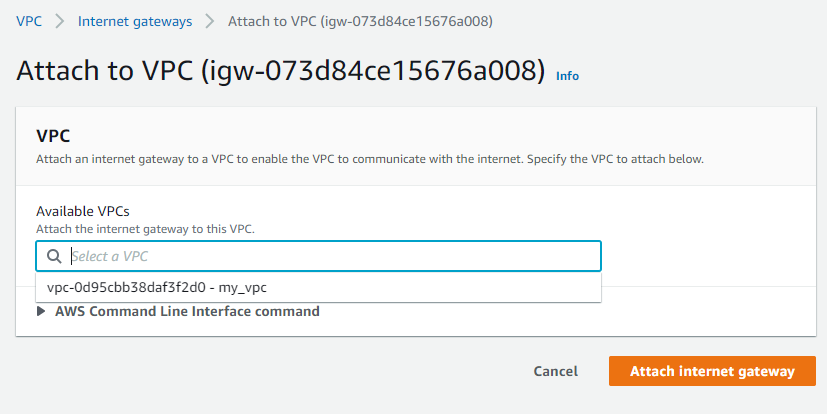
At this point, the internet gateway is created but is yet to be attached to our VPC. To do this, on the redirected page, select ‘Actions', then 'Attach to VPC’.

On the new page, select the newly created VPC from the dropdown menu and click ‘Attach internet gateway’.
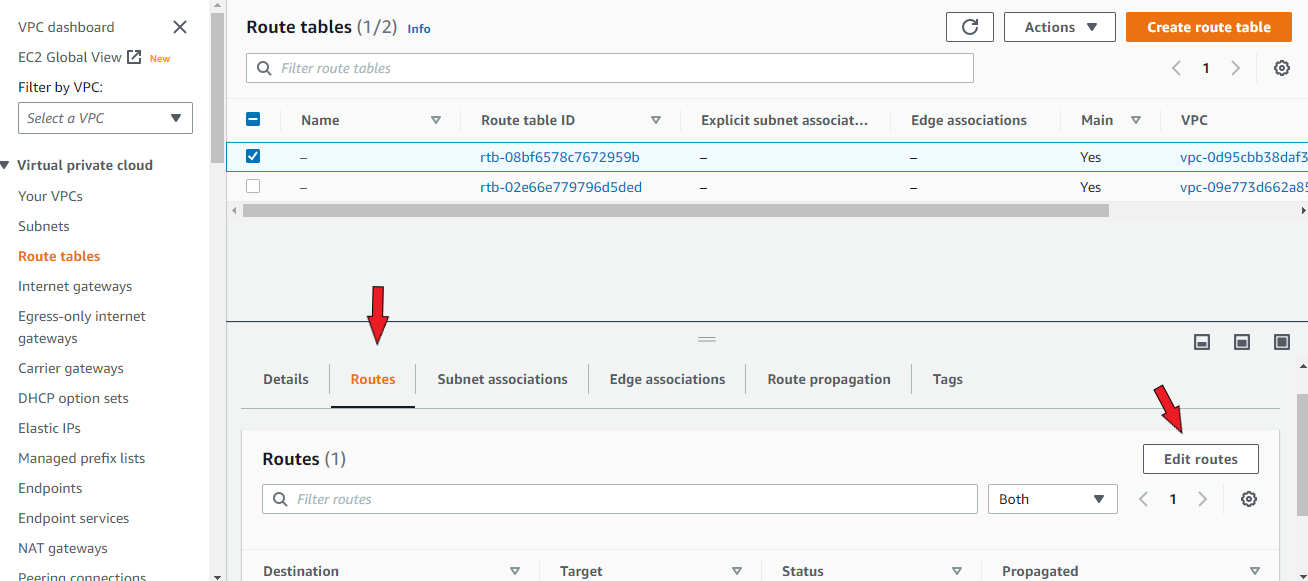
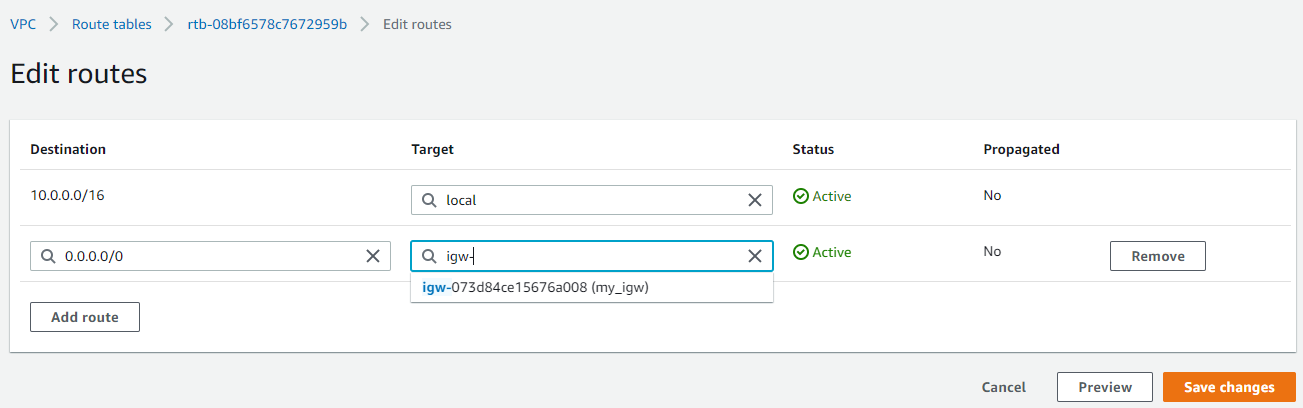
5. Create a Public Route Table

Select the new route table. Below, select ‘Routes’ then ‘Edit routes’.
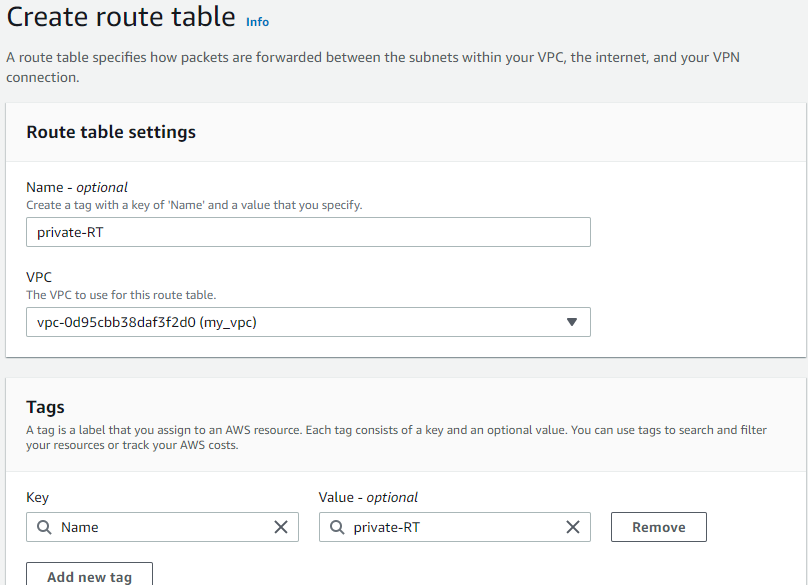
6. Create a Private Route Table
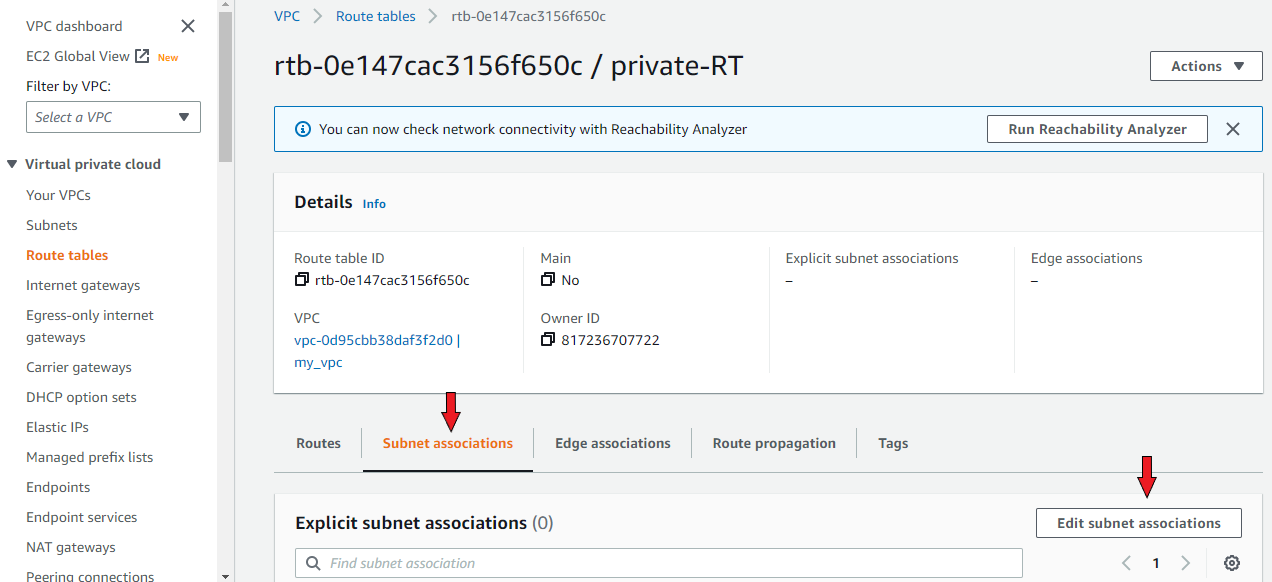
7. Associate Subnets with Route Tables
To associate our private subnets to our private route table, select ‘Subnet associations’. Click on ‘Edit subnet associations’.
Choose the private subnets from the list and click on ‘Save associations’.

Conclusion
So there you have it! We have successfully created a custom VPC with all the requirements stated earlier. You can now choose to do much more within the VPC such as spinning up instances, and so on. If you'd like to see how you can create instances, direct internet traffic to the private subnets or spin up a load balancer, check out this article.
A note from me
Thank you for reading this article. I hope you found it useful and I look forward to your feedback/comments.


