AWS: Deploying Nginx & PHP on private EC2 instances sitting behind a Load Balancer

I loveee Linux & the command line! I could sell my birthright for some cake I watch movies, eat, play music & day-dream in my spare time
Today I’ll be sharing the steps required to use an application load balancer to route traffic requests to private instances that are configured with the Nginx web server.
By the end of this tutorial, we should have the following set up:
Two private EC2 instances with Nginx & PHP installed using user-data
A NAT instance that provides internet connection to the private instances
A Bastion host that facilitates SSH access to the private instances
An application load balancer that routes requests between both instances
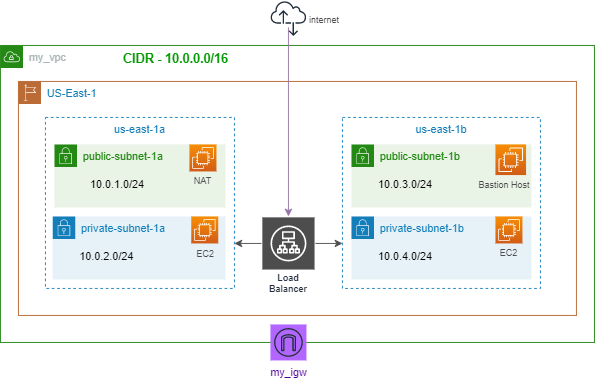
I have an existing custom VPC which contains 2 private subnets, 2 public subnets, a public route table, a private route table and an attached internet gateway. If you don’t know how to create a VPC (Virtual Private Cloud), you can read through this article for a step-by-step guide on how to do so.
For this tutorial, we'll spin up a total of four EC2 instances; two private instances, a public NAT Instance and one bastion host. But before we begin, let's define some of these terms to know what purposes they serve.
A NAT (Network Address Translation) Instance is a public EC2 instance that provides outgoing internet connectivity to instances in a private network/subnet.
A bastion host is a public instance that allows SSH access to instances in a private subnet. When you access this server via SSH, it allows you to forward this access/connection to other instances that are at a deeper level within your VPC. Such instances are typically private and cannot be reached directly. We could say that a bastion host acts as a bridge between private instances and the user.
1. Create NAT Instance
Let’s begin by creating the NAT instance
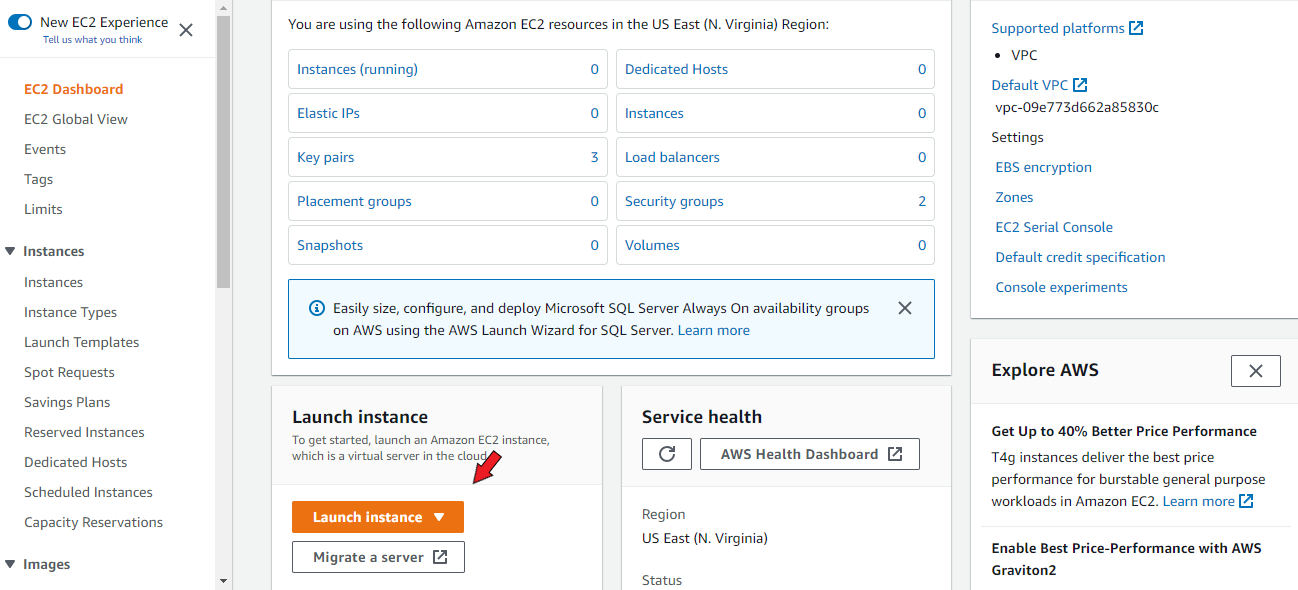
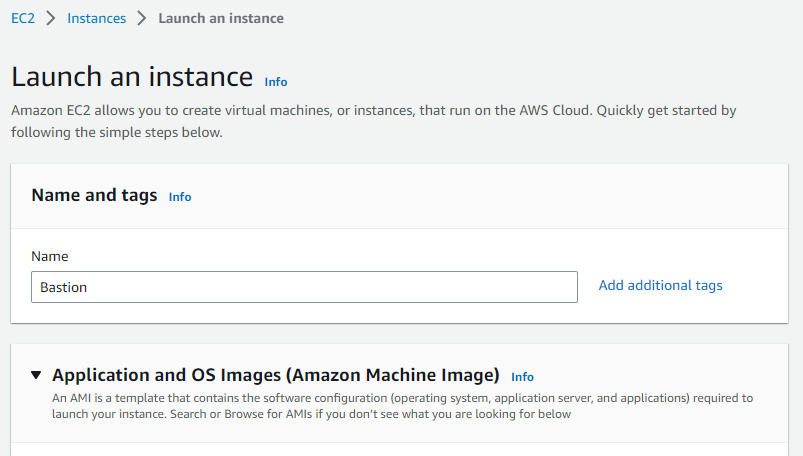
Search for EC2 services on the AWS console & click ‘Launch instances’.
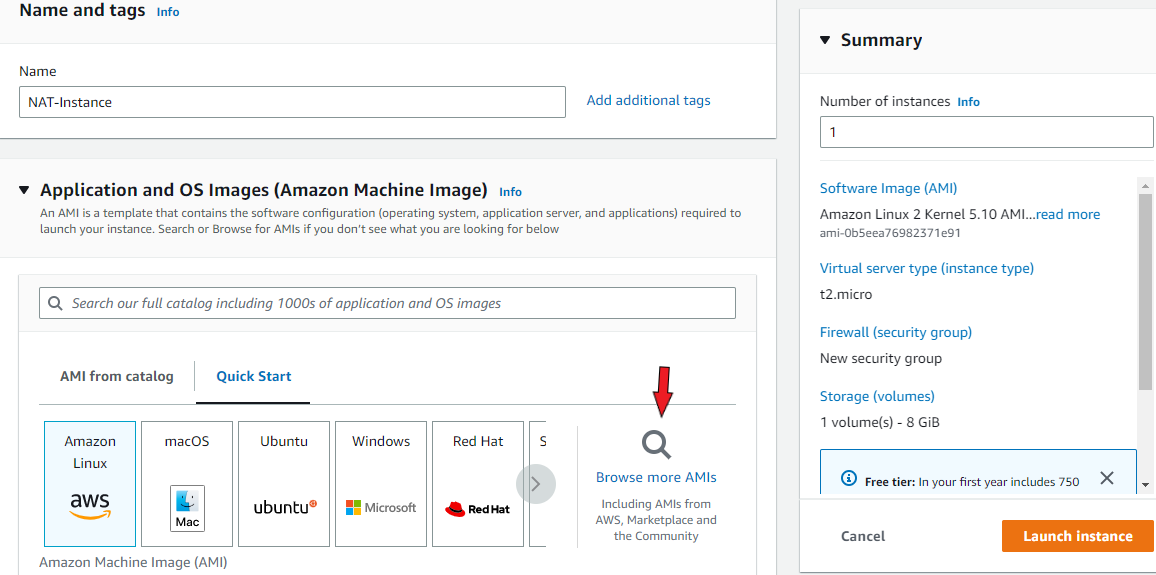
Enter a suitable name for your instance. Under ‘Application & OS Images’, click on the ‘Browse more AMIs’ link.
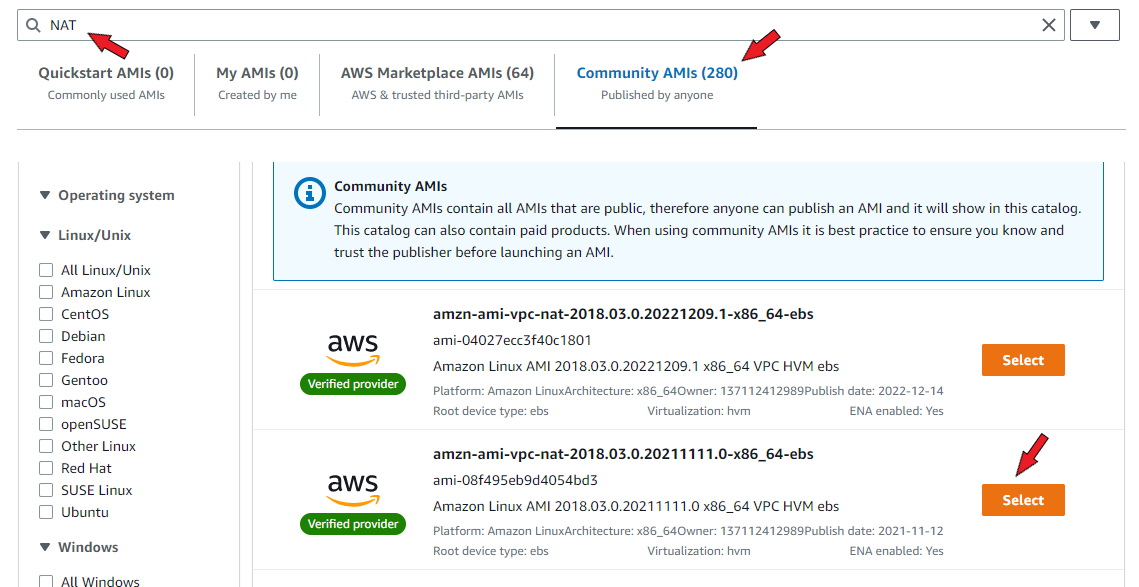
Enter "NAT" in the search bar and select ‘Community AMIs’. This should list out the images that are configured to provision NAT functions. Choose any suitable AMI from the list.
Select ‘t2.micro’ under instance type and choose/create your key pair for ssh access to your instance.
Click ‘Edit’ under Network settings, select your custom VPC from the dropdown menu and choose one of the public subnets. ‘Auto-assign public IP’ should be enabled. If it isn’t, enable it. This is crucial.
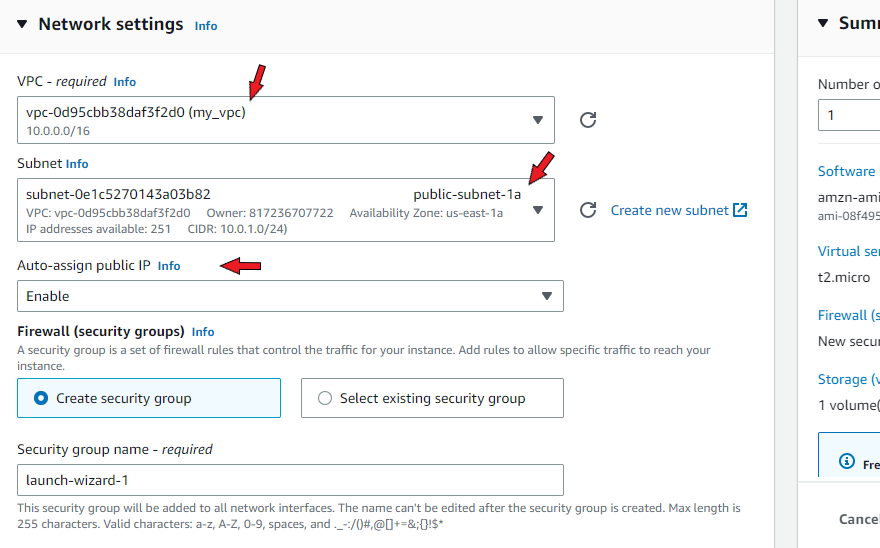
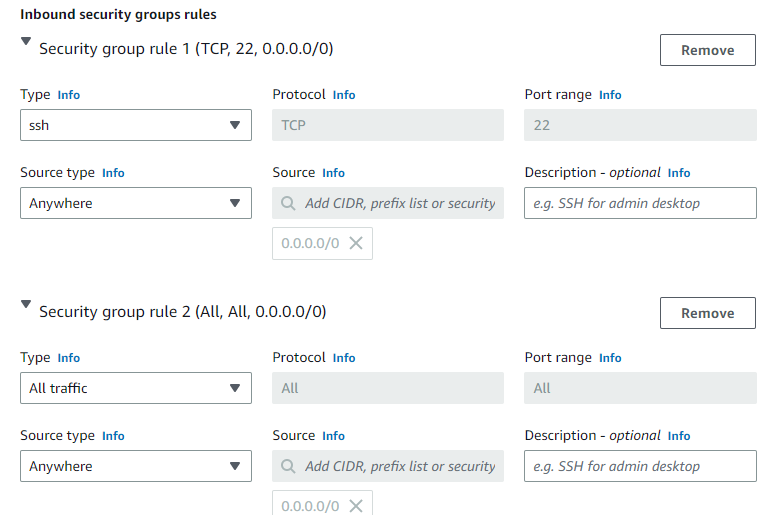
Create a new security group and give it a name. Add a rule to allow ‘SSH’ and another to allow ‘All traffic’.
Click on ‘Launch instance’ to create the instance. After a ‘success’ prompt, navigate to ‘Instances’ to see the status of your new instance. Select the instance and click on ‘Actions’ -> ‘Networking’ -> ‘Change source/destination check’. Tick ‘Stop’ and save.


2. Configure Private Route Table
One purpose for private instances is to keep sensitive applications shielded away from external access. However, sometimes we may need an internet connection to perform certain functions such as downloading updates from repositories.
To provide internet access to our private instances we can connect them to our NAT instance. Since it has internet connectivity, we can route traffic from this instance to our private instances.
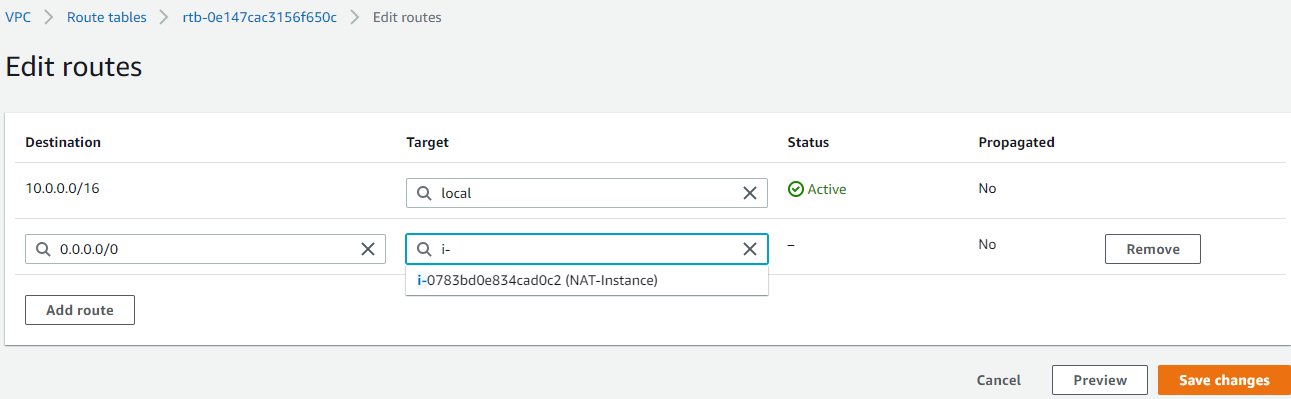
To do this, go to VPC services and then Route tables. Select the private route table. Below, click on ‘Routes’ then ‘Edit routes’.
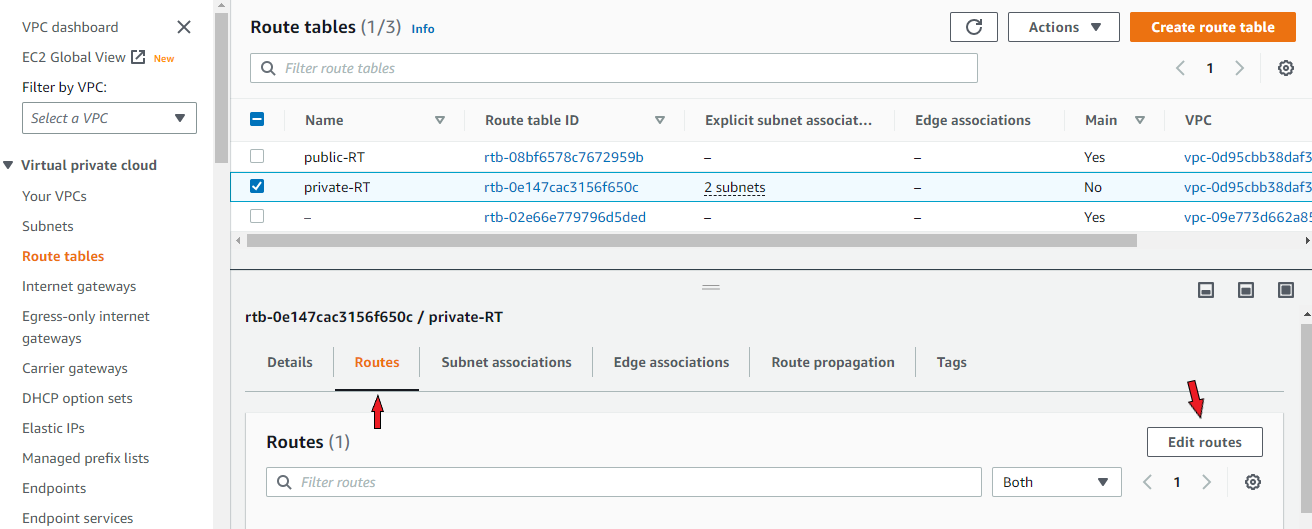
On the Edit routes page, add a new route. In the field under ‘Destination’, select ‘0.0.0.0/0’. In the next field under ‘Targets’, select ‘Instance’ from the menu and then the newly created NAT instance. Save changes.
3. Create Bastion Host
Go back to EC2 services and ‘Launch Instances’. Provide a name for the Bastion host.
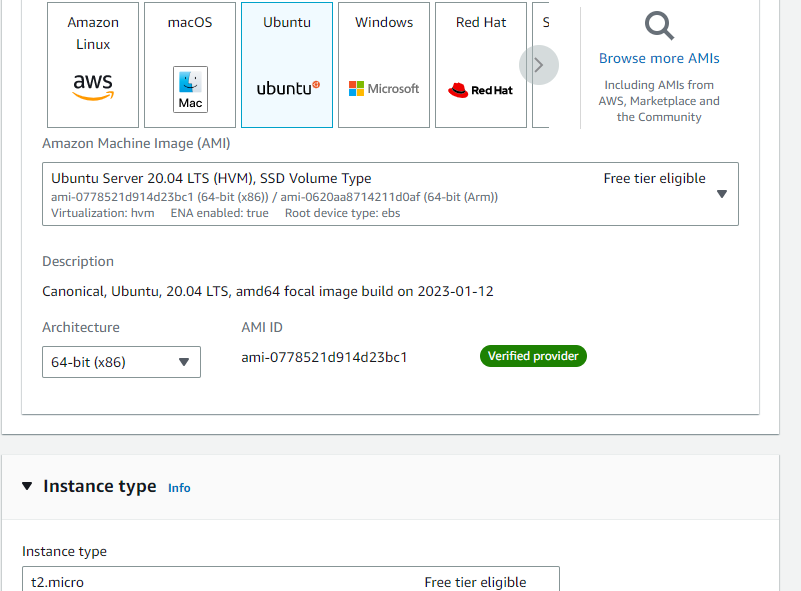
For the AMI, I'll be using Ubuntu 20.04 and choosing t2.micro for the instance type.
Select your key pair. In network settings, select the custom VPC, and the second public subnet. Again, you MUST enable ‘Auto-assign public IP’ if it isn't enabled already.

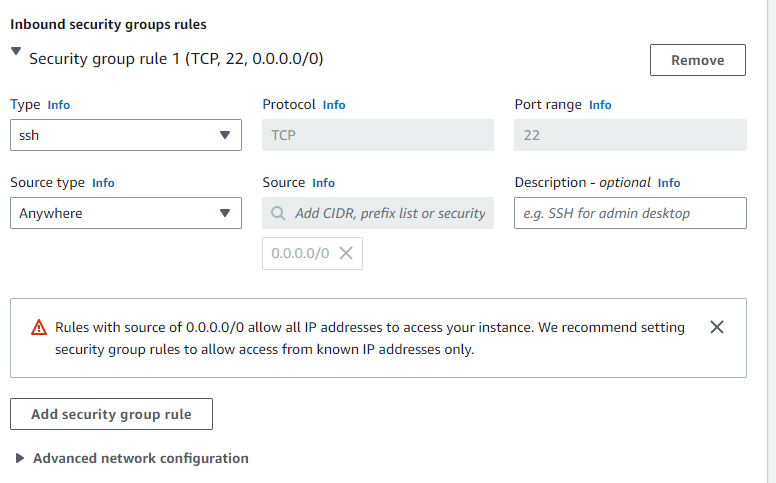
Create a new security group and this time, allow only SSH access from anywhere. Launch the instance.
4. Create Private Instances
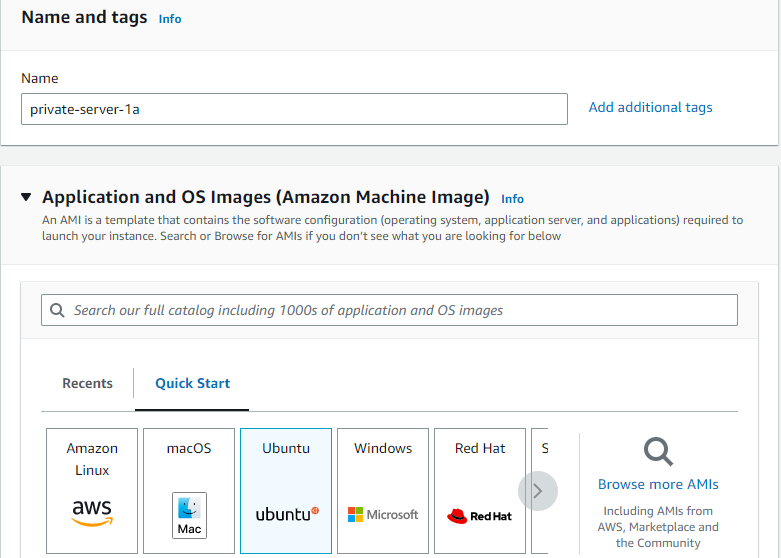
Go back to EC2 services to launch the private Instances. Provide a name for your first private instance. I called mine "Private-Server-1a" to indicate its availability zone. For the AMI, I will be also using Ubuntu 20.04.
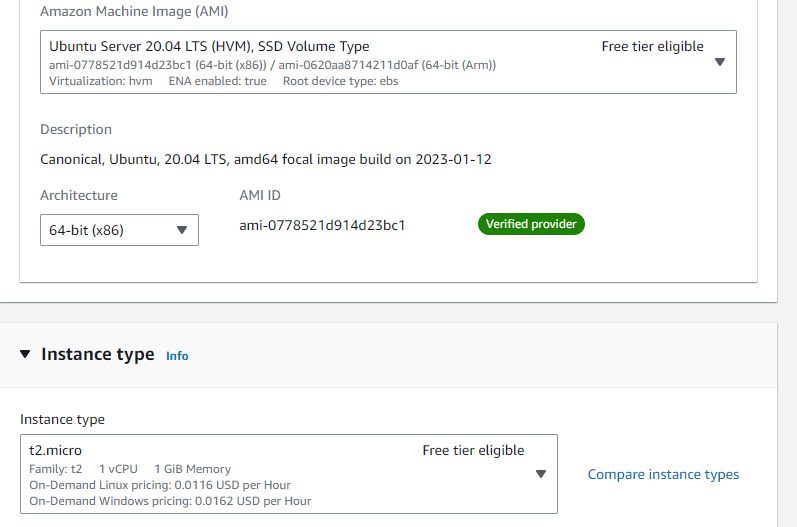
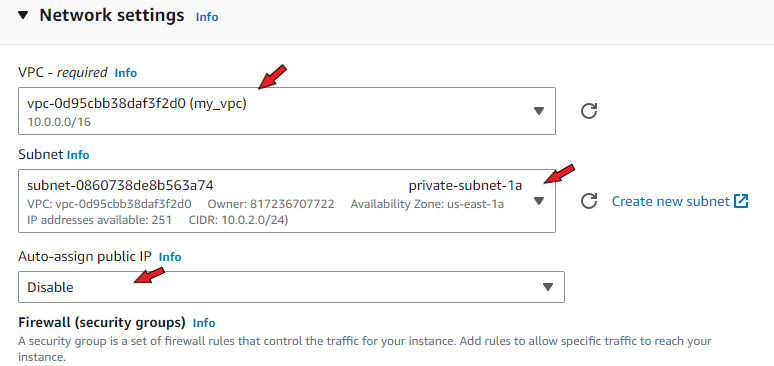
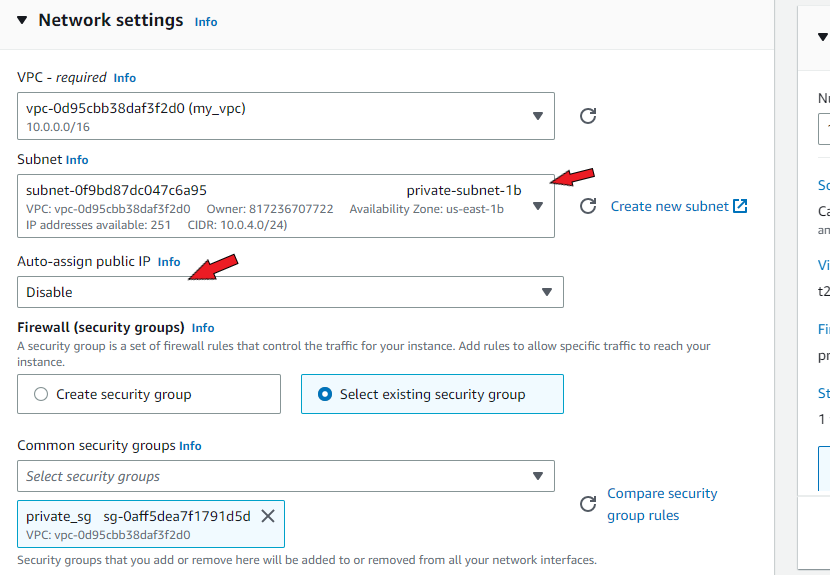
Choose your key pair. In network settings, select the custom VPC, and the private subnet in availability zone us-east-1a (or whichever you had included in your VPC). This time around, you must disable ‘Auto-assign public IP’. This ensures that the instance is private and has no access to the internet.
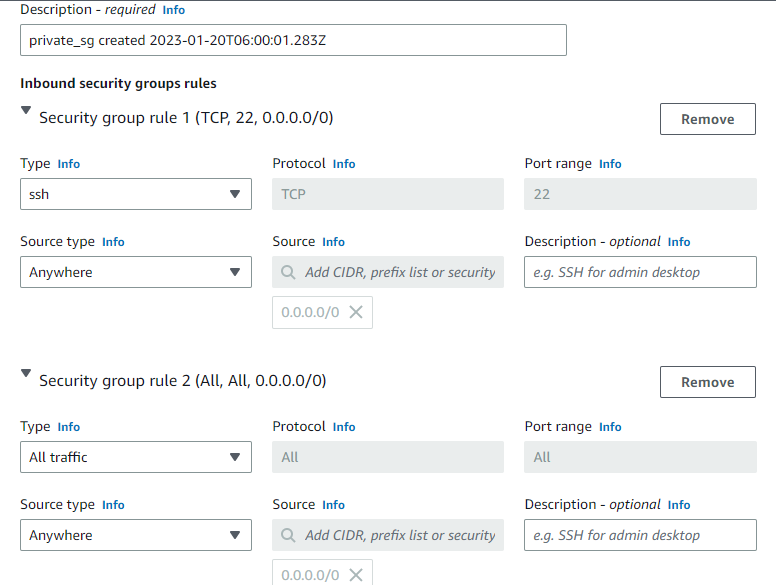
Create a security group for the private instances. Give it a name that indicates its purpose & differentiates it from other security groups e.g ‘private_sg’. Give it an SSH rule and a rule that allows ‘All traffic’ (see below)
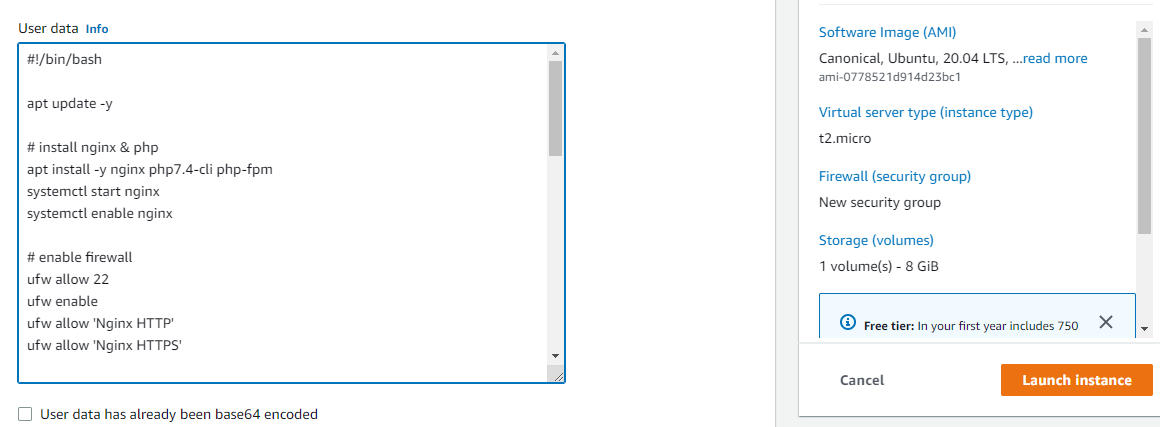
Next, select ‘Advanced details’. Scroll down till you find a box field titled ‘User data’. This is where we'll include our Bash script that will install Nginx and PHP. It will also configure a new Nginx server block that will serve our web page with the instances' respective IP addresses displayed on their index pages. Refer to the script below. You can copy & paste it into the user data field to save yourself some time.
#!/bin/bash
apt update -y

# install nginx & php
apt install -y nginx php7.4-cli php-fpm
systemctl start nginx
systemctl enable nginx

# enable firewall
ufw allow 22
ufw enable
ufw allow 'Nginx HTTP'
ufw allow 'Nginx HTTPS'

# create new server block
echo "server {
        listen 80;
        root /var/www/html;
        index index.php index.html index.htm index.nginx-debian.html;

        server_name _;

        location / {
                try_files \$uri \$uri/ =404;
        }

        location ~ \.php$ {
                include snippets/fastcgi-php.conf;
                fastcgi_pass unix:/var/run/php/php7.4-fpm.sock;
       }

       location ~ /\.ht {
            deny all;
       }
} " > /etc/nginx/sites-available/test

ln -s /etc/nginx/sites-available/test /etc/nginx/sites-enabled/

unlink /etc/nginx/sites-enabled/default

systemctl reload nginx

echo '<?php
           Print "<h1><center>".gethostname()."</center></h1>";
?>' > /var/www/html/index.php
Click on ‘Launch instance’ to create.
For the second private instance, repeat the same steps but it should be named differently. I named mine ‘Private-Server-1b’. Also, select the second private subnet which is in a different availability zone (us-east-1b).
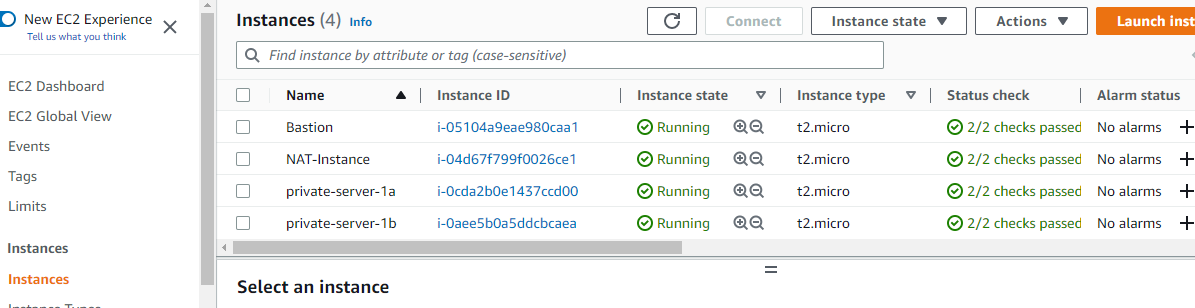
Choose the same security group created during the launch of the previous private instance and don’t forget to include your user data. Launch Instance to create and confirm that all four instances are running by navigating to ‘Instances’.
5. Access Private Instances
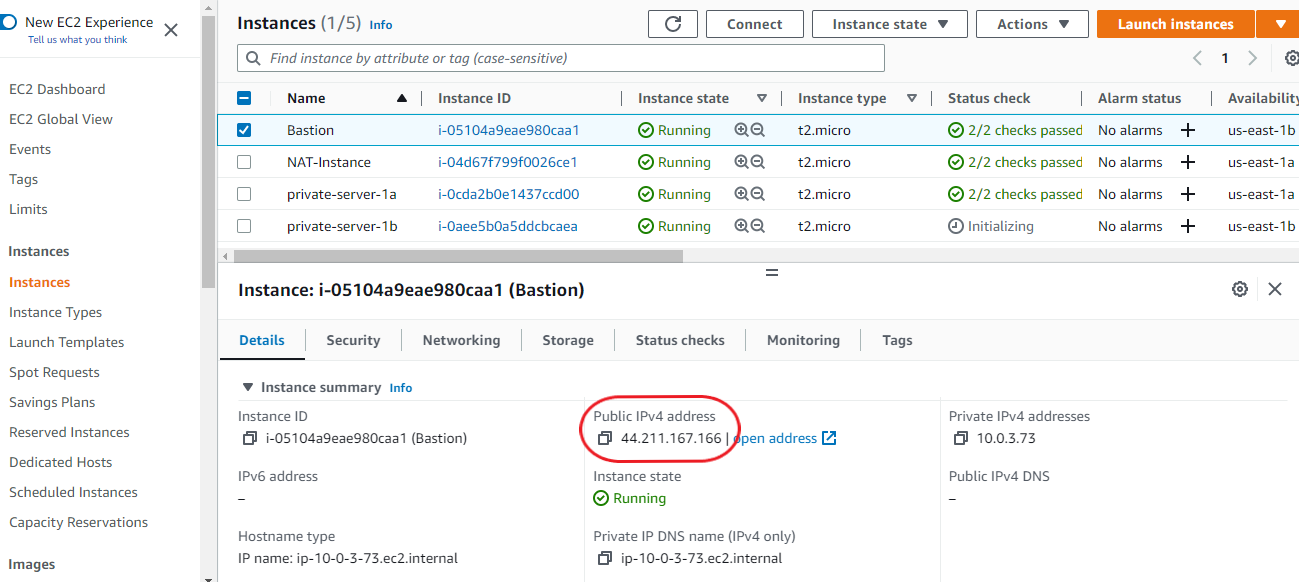
So how do we gain access to our private instances since they are not assigned public IPs? This is where a Bastion host comes in. Select the host from the list of instances and copy its Public IPv4 address.
On your computer system, open the folder where you have your key pair saved. Right-click anywhere within this folder and select ‘Gitbash here’ (If you don’t have Gitbash installed, you can use your system’s command line. Be sure to navigate into the directory where your key pair is saved before carrying out the following steps).
On your terminal, type:
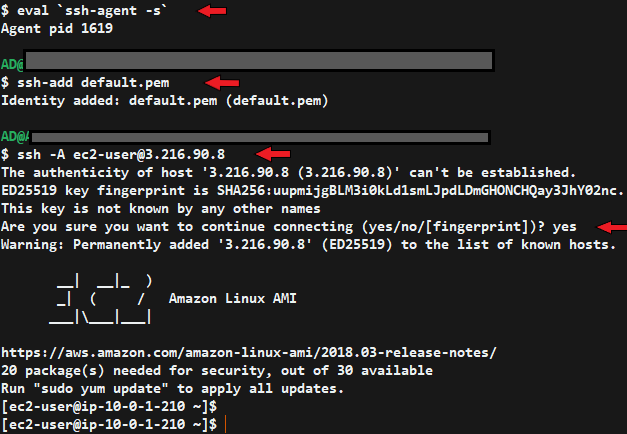
eval `ssh-agent -s`
The ssh-agent is a program that stores private keys for authentication. This command starts up an authentication session using a key (The key is returned after you type the command above). Next:
ssh-add 'key-pair name'.pem
The above will add your key pair to the list maintained by the ssh-agent while the command below forwards the current ssh-agent session (which contains details of your added key pair) to the bastion instance.
ssh -A ubuntu@'Bastion IPv4 address' OR ssh -A ec2-user@'bastion IPv4 address'
Type ‘yes’ at the prompt and you should be logged into the bastion host.
Now, to log into your private instance(s) from your bastion host, select your private instance from the AWS console and copy its Private IPv4 address.
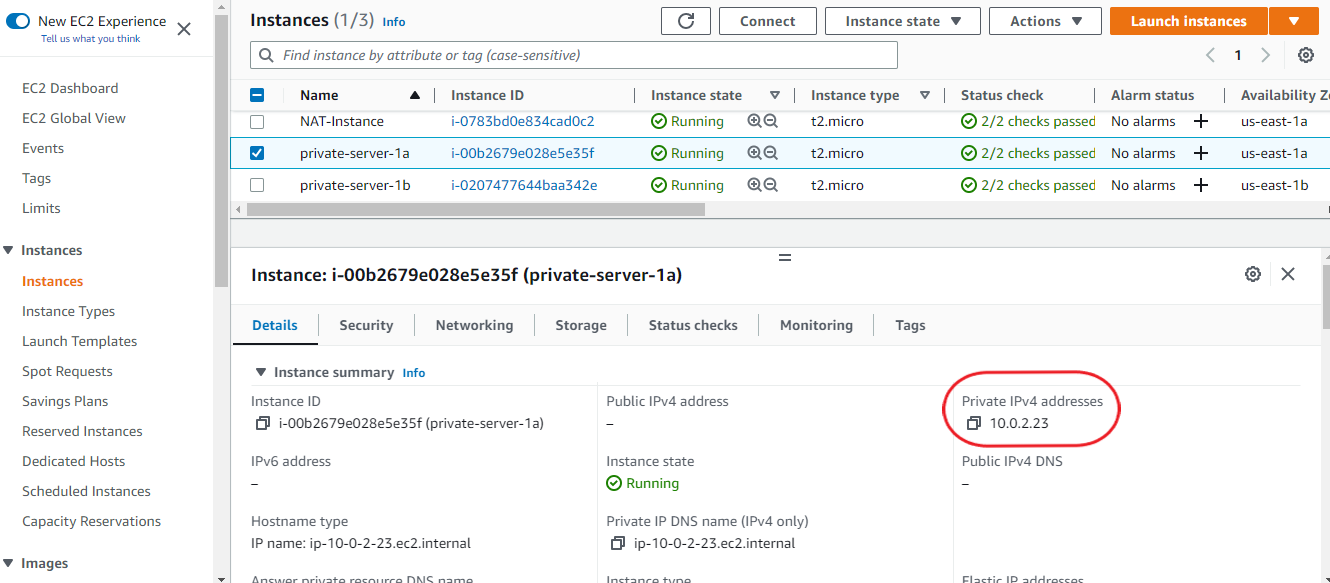
Whilst still logged into your Bastion, enter the following and type 'yes' at the prompt to log into the private instance.
ssh ubuntu@'private instance IPv4 address'
In the private instance, confirm that traffic is indeed being routed in via the NAT instance by sending a ping request:
ping google.com
Getting responses means internet traffic is successfully being routed. End the ping responses by typing CTRL + Z on your keyboard. You could also confirm the installation and status of Nginx:
sudo systemctl status nginx
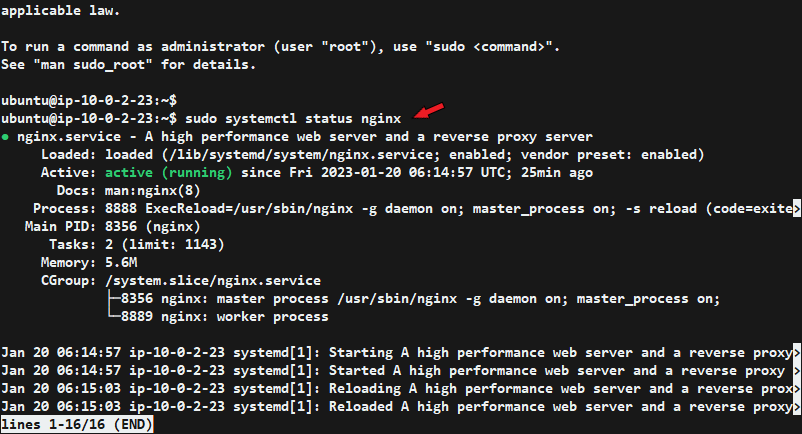
Press ‘q' on your keyboard to exit the status report.
To log out of your private instance, type CTRL + D. You should be back to your bastion instance. You can copy the IPv4 address of the second private instance and login using the same steps. Again, type CTRL + D to log out of the private instance and repeat to log out of the bastion host.
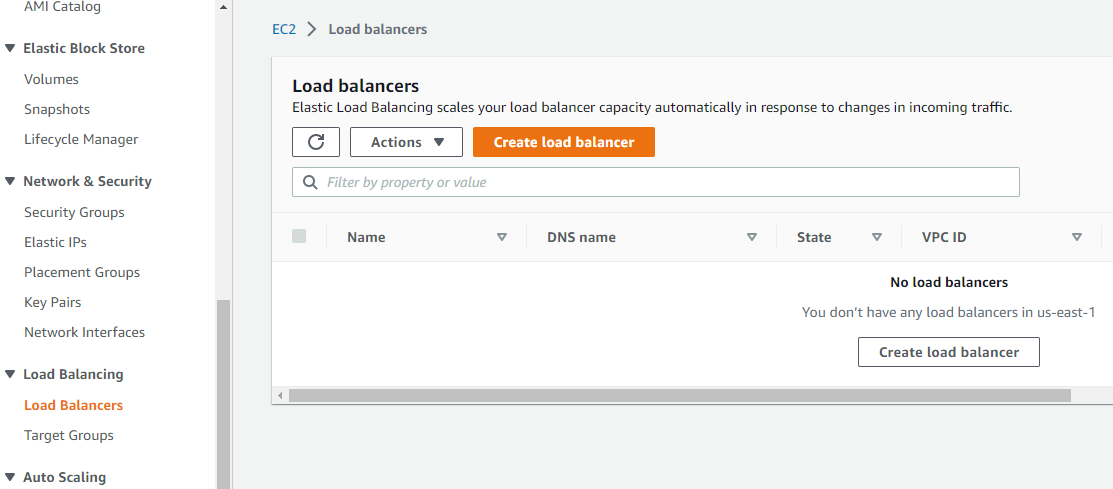
6. Configure Load Balancer
Go back to the AWS console and navigate to EC2 services. On the left panel, scroll down to select Load Balancer, then click on ‘Create load balancer’.
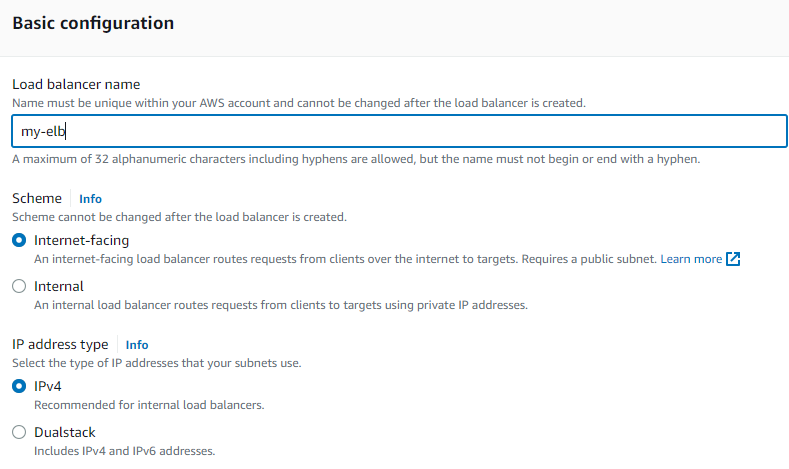
Click ‘create’ under Application Load Balancer on the following page. Next, enter a name for the load balancer. It should be internet-facing and set to provide an IPv4 address by default. Leave it as such.
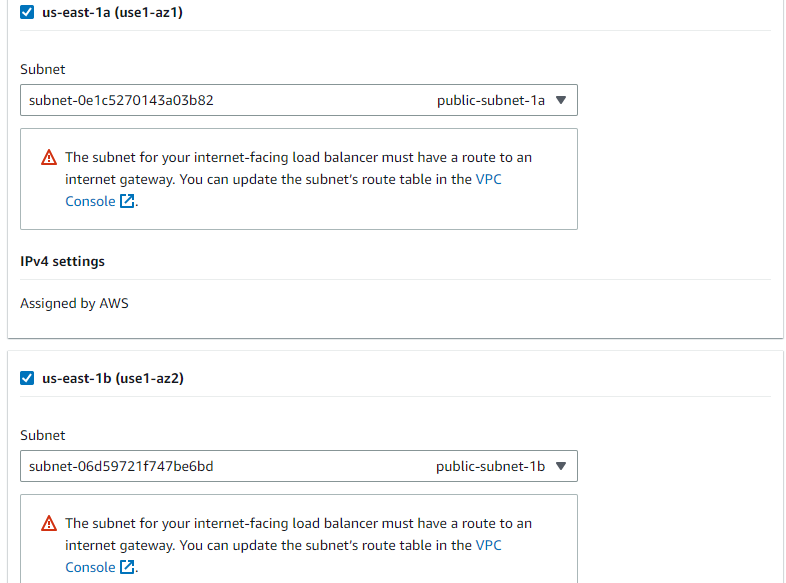
Under the ‘Network mapping’ section, select your custom VPC from the drop-down. Tick both availability zones. In each case, you’d be required to select a subnet. Choose your public subnets in both cases.
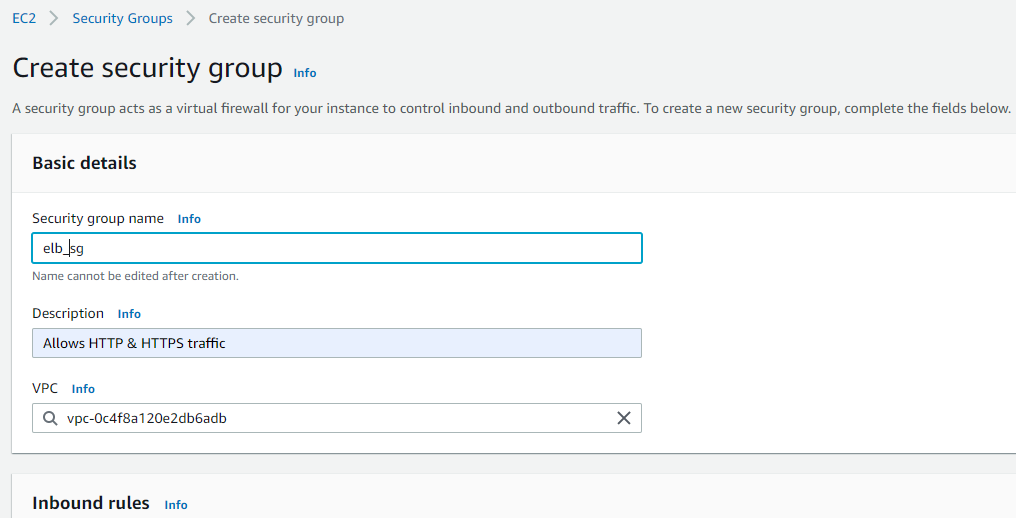
Click on ‘Create a new security group’ to make security rules for the load balancer. You will be redirected to a new page where you must enter a name for the group, and a description. Select the custom VPC in the VPC field.
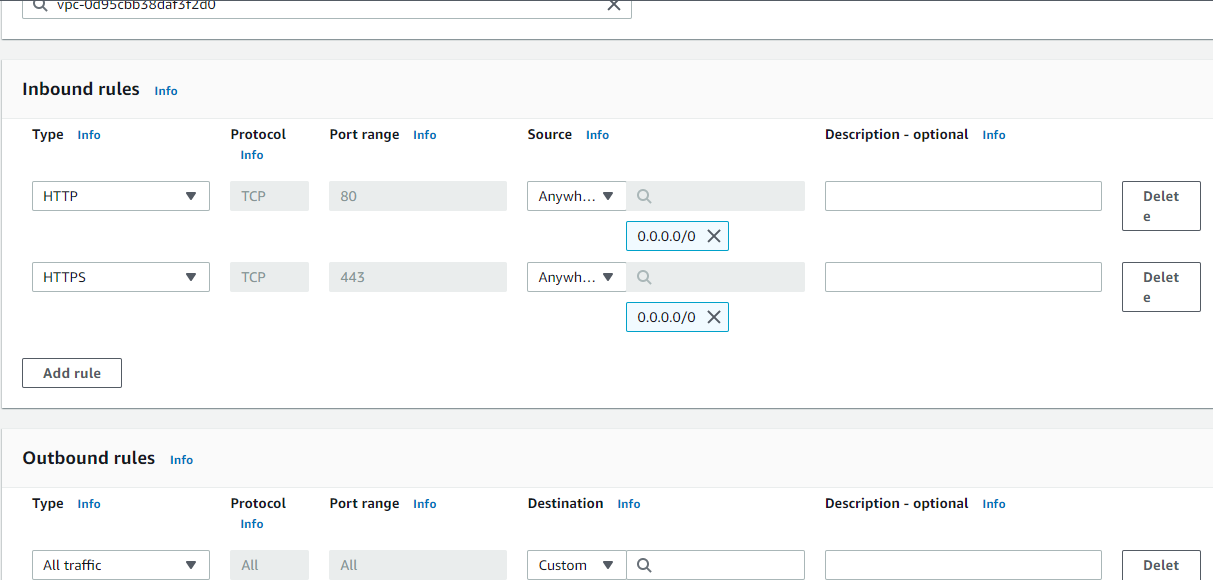
Under Inbound rules, add a rule to allow HTTP from anywhere (0.0.0.0/0) and add another to allow HTTPS like shown below. Click ‘Create security group’.
Go back to the previous load balancer page. Refresh the security group’s field and select the newly created security group.

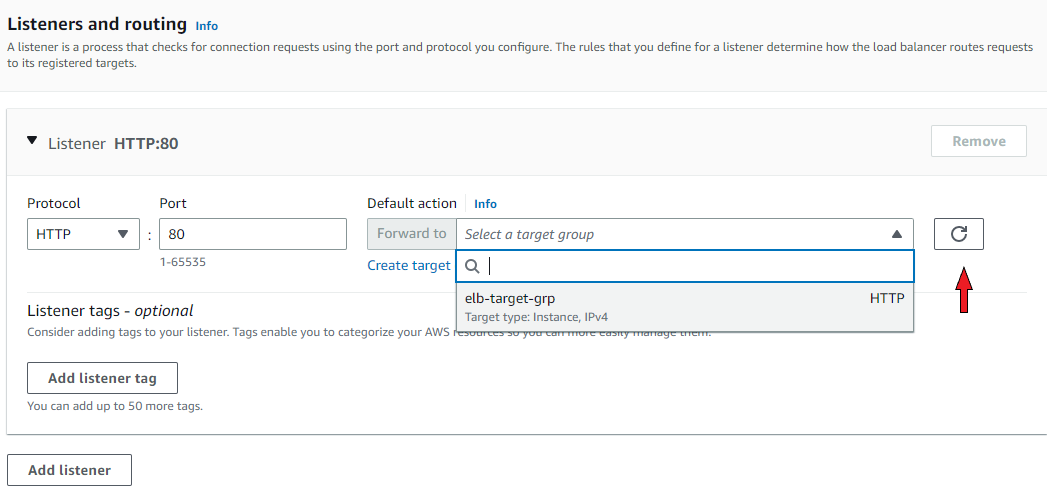
Under ‘Listeners and routing’, choose ‘Create target group’. You'll be redirected to a new page that allows you to set up a target group for your load balancer. Your target type should be set as ‘Instances’ (default). Enter a name for the target group and be certain that the custom VPC is selected in the VPC section.

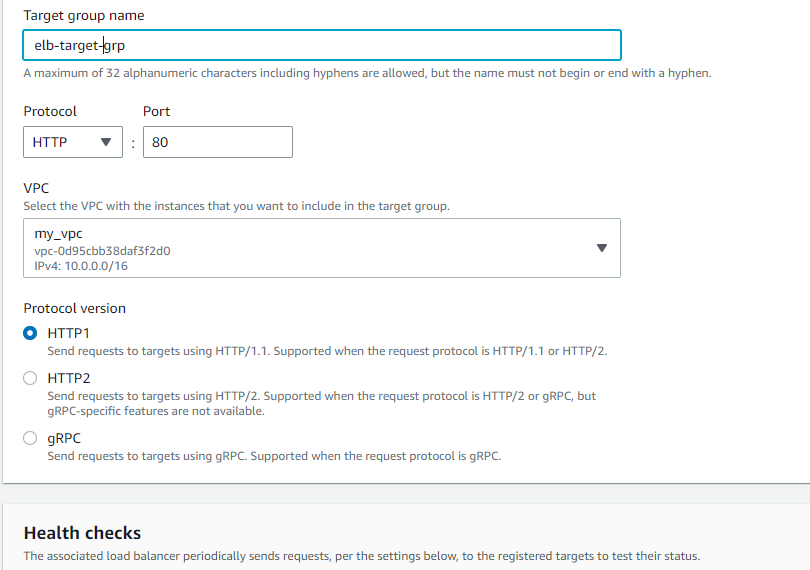
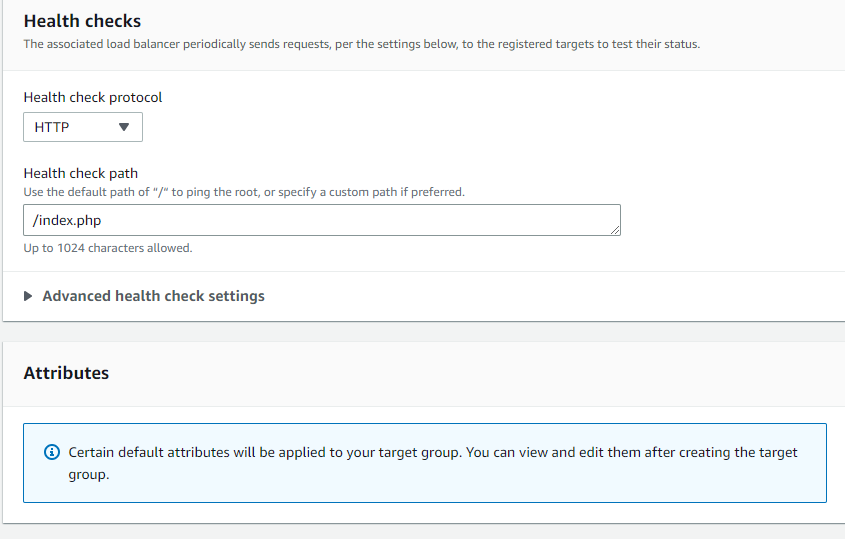
Under ‘Health checks’, enter the path that the load balancer tests for the health of each instance. Here, I entered /index.php which is our instances’ home page. Leave other settings as they are and click on ‘Next’.
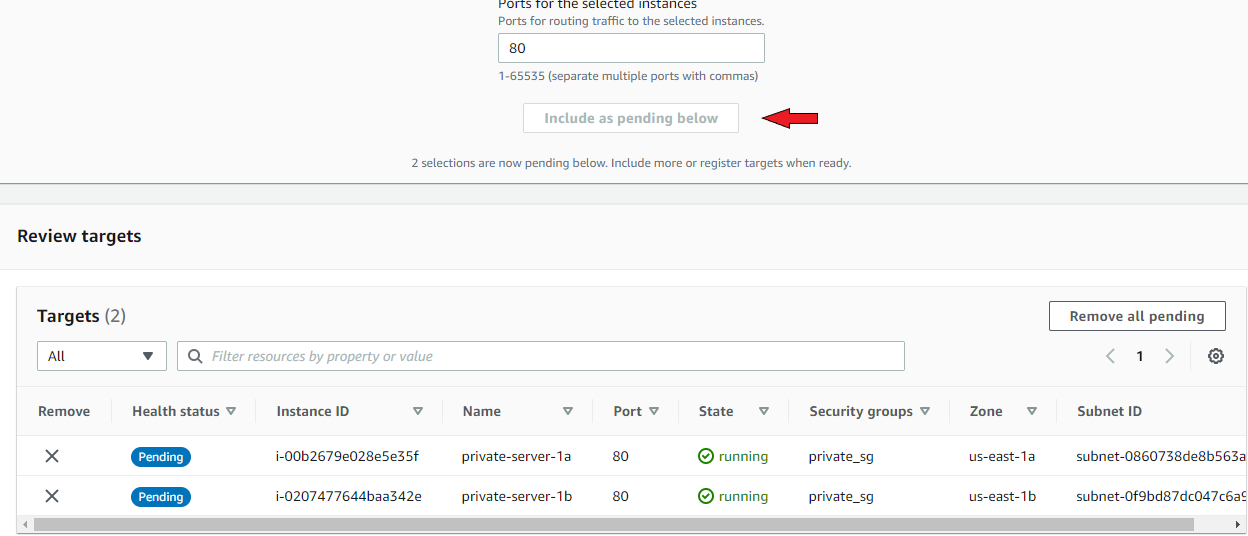
This is where you add your private instances to the target group. Select ONLY your private instances, and be sure to click ‘Include as pending below’. Create the target group.

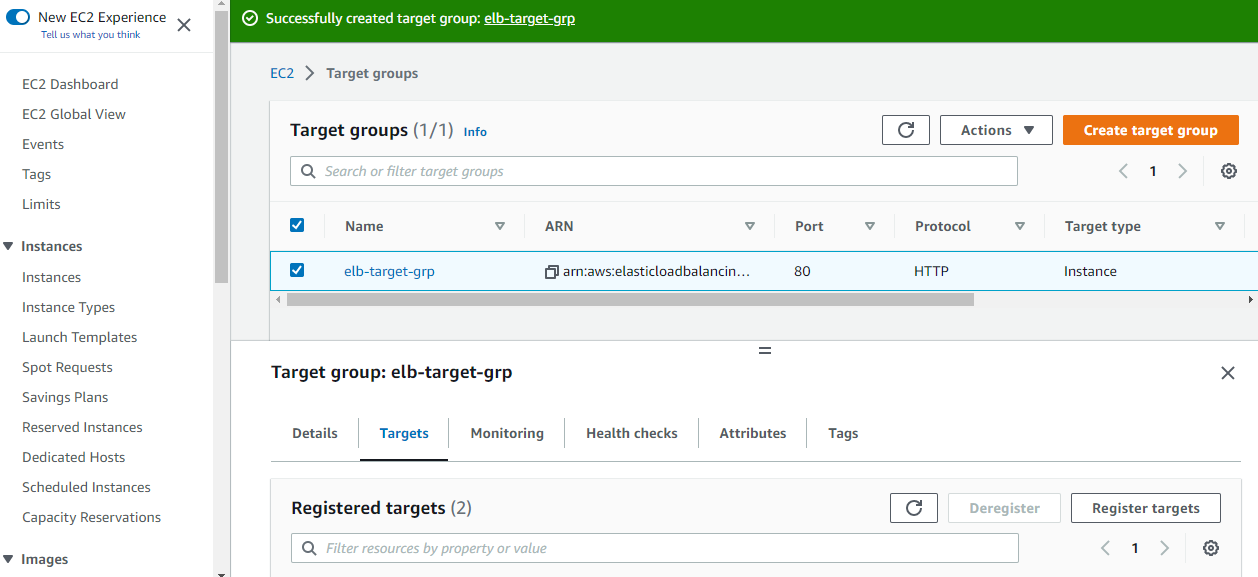
After doing so successfully, go back to the previous load balancer page, refresh the target group field and select the just created target group from the drop-down.
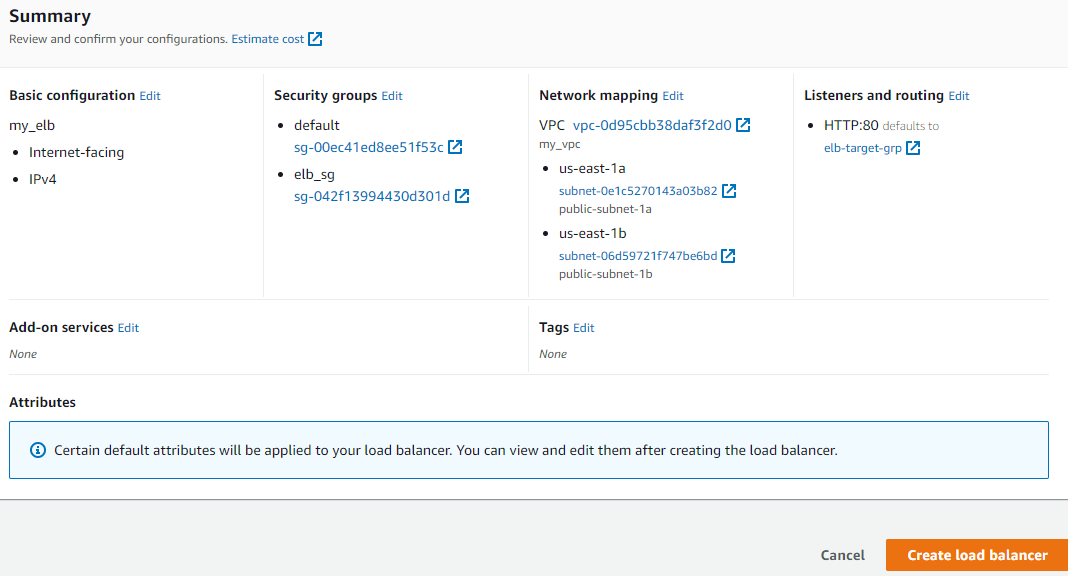
Scroll down to find a summary of your configuration and confirm that its information is correct. Click to 'Create load balancer'.
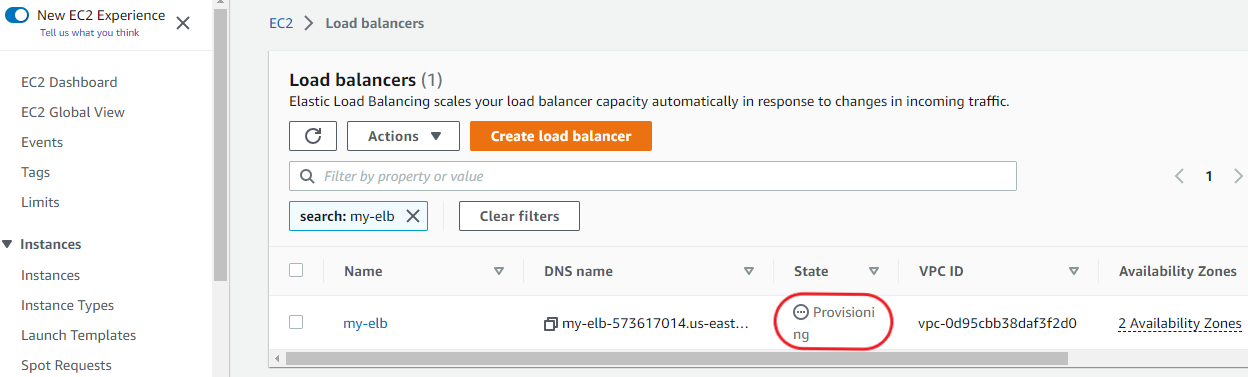
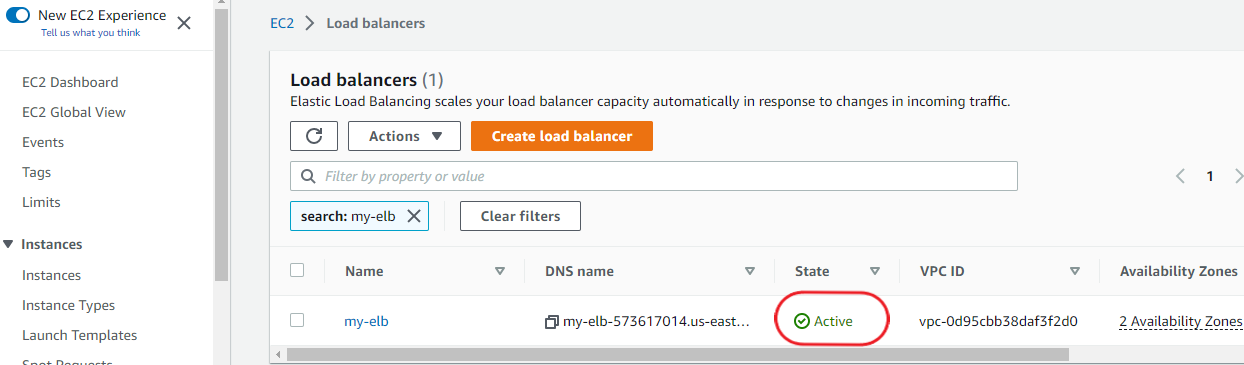
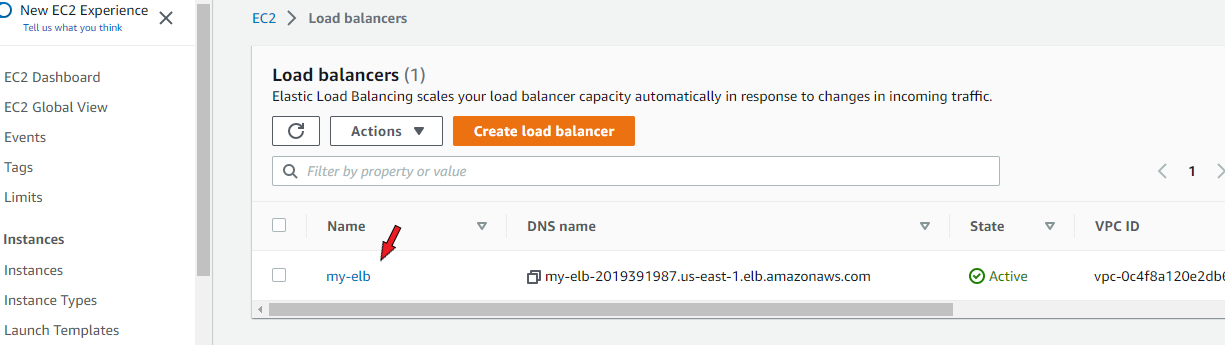
Click on ‘View load balancer’ on the next page. You will likely find that the load balancer Is in a ‘provisioning’ state. Wait for a while and refresh until it's in an ‘Active’ state.
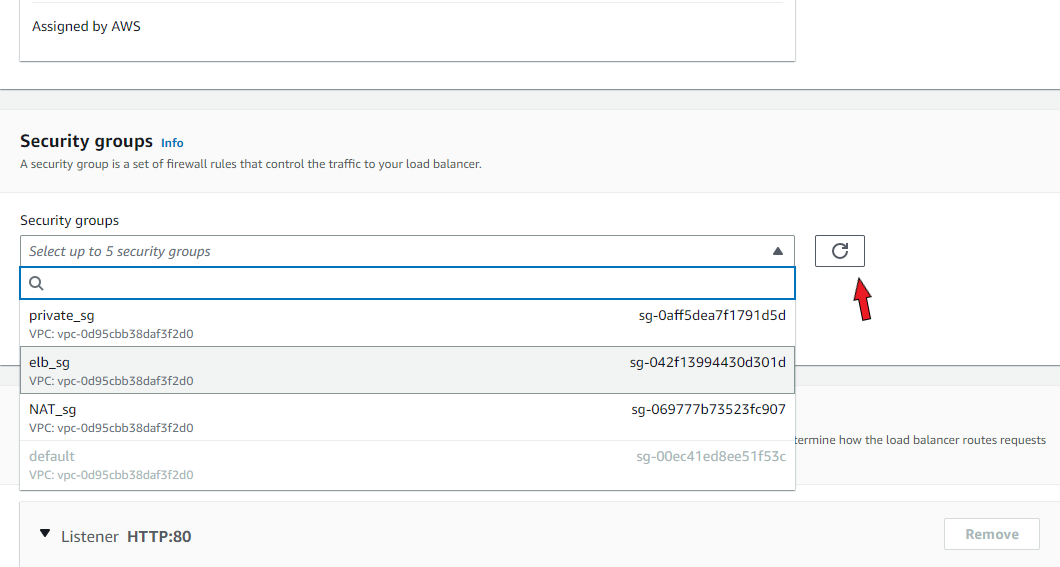
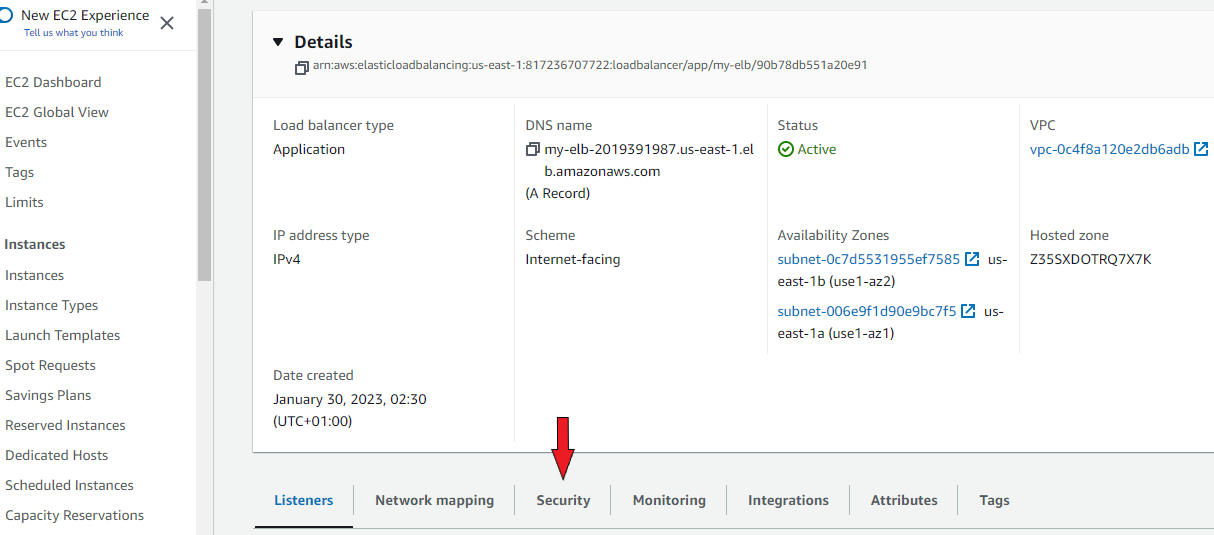
You may have to include the security group of your private instances in the load balancer security settings. Click on the name of the load balancer.
On the following page, select 'security'. Click 'edit' and select the drop-down menu where you will find a list of all your security groups. Select the security group assigned to your private instances.
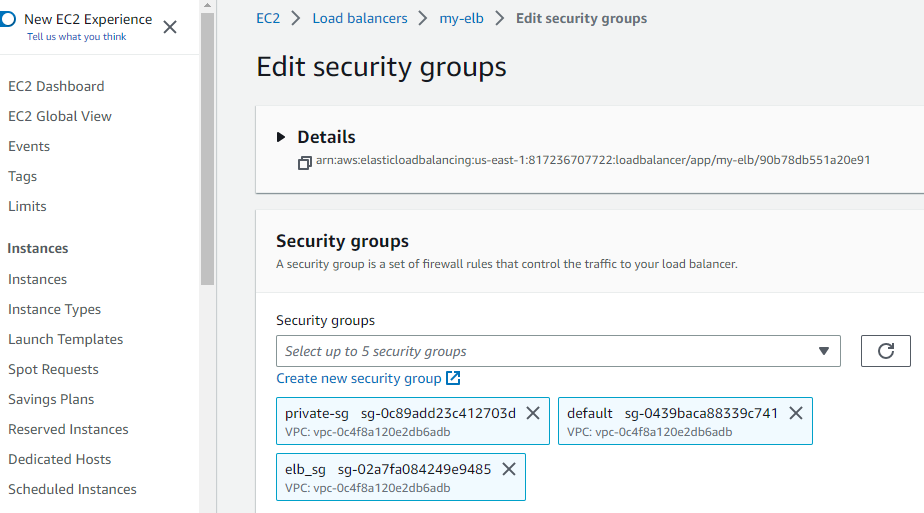
Save changes and go back to the load balancer page. Copy its DNS name and paste it onto your browser.
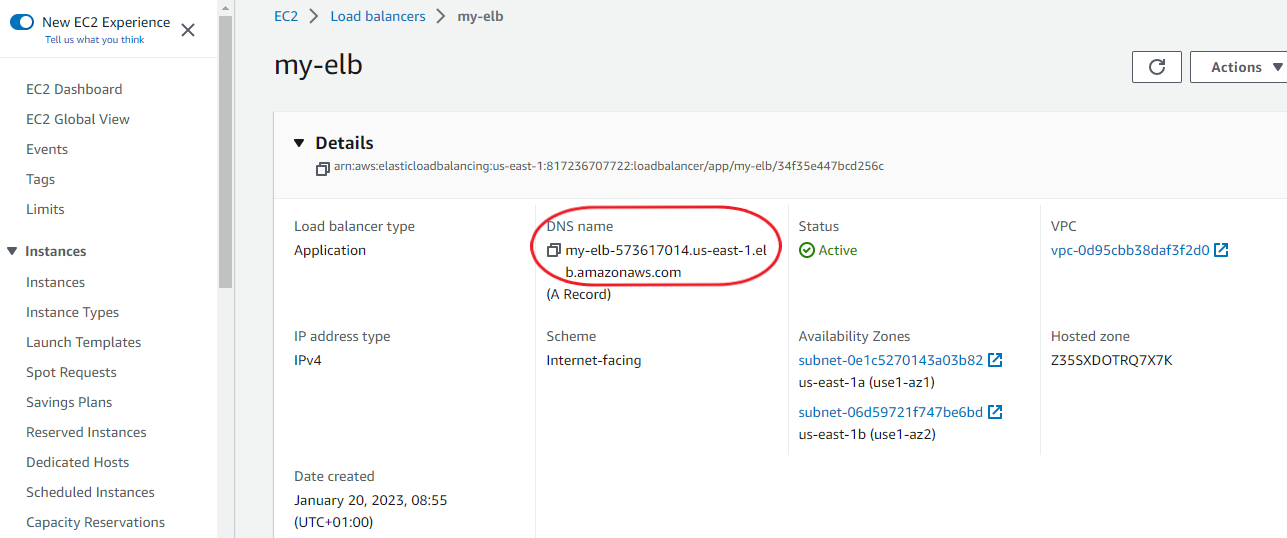
You should be redirected to the index page of one of your private instances. If you keep refreshing the page, the browser should toggle between the two private instances. This is the purpose of the load balancer: to balance out traffic between instances.


Conclusion
We have come to the end of this tutorial. Thank you for stopping by and reading up to this point. I hope you had as much as I did working on this mini-project. If you happen to have any queries or suggestions, please leave a comment below and I will be happy to get back to you. Cheers!


